Playing with Clay

Tile with hexagons Part of the fun of working with clay is experimenting with various textures and procedures.

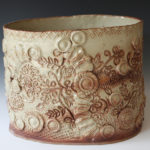
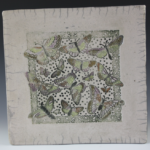
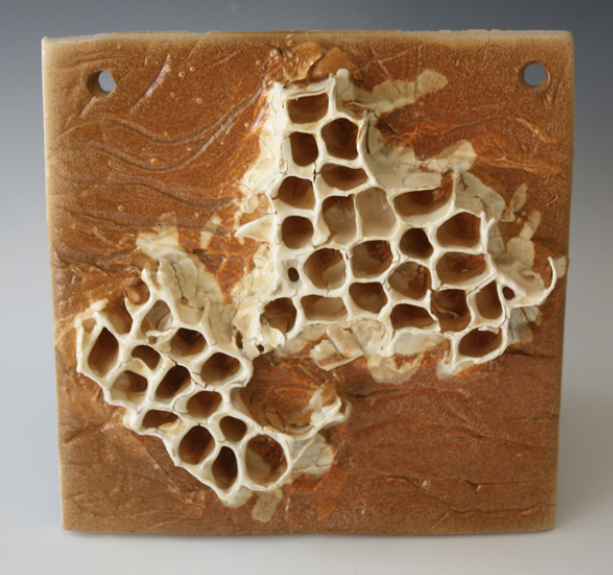
This tile is a semi-successful experiment.  I had some cardboard with a waffle texture and wondered what would happen if I added it to a flat tile.  Naturally, the cardboard would burn out in the bisque firing but, if the waffle pattern was coated with with slip before firing it, what would happen??

Well, the waffle pattern was saved but it’s very delicate in the bisque state.  So, I quickly added some glaze on top of the waffle pieces and then sprayed glaze on the tile.  In fact, the glaze helped the waffle pieces adhere to the tile.  This is what it looks like after being fired to cone 5.


Garden Totems

Yesterday was a great day!!  It was “Kiln Opening Day” and, when all the pieces were unloaded, I had the final pieces for the garden totems.

These totems were started several months ago and it just took time to build the pieces, bisque fire them, glaze them and fire them again.  One totem is whimsical faces and the other is state license plates.

When the chance of Spring storms, with the possibility of hail and tornadoes, passes, they’ll be added to the garden.  Can’t wait!

Pots, Plants and More Pots

About a year ago, I fell in love with succulents and cacti.  The sheer variety is amazing.  The more I bought and collected, the more pots I needed.  Thank goodness, I happened to have a large supply of clay in the studio.

So, I started making pots for the plants.  I made big pots and small pots, glazed them and settled the plants into my pots.  For the most part, they seem to like the custom made pots and are rewarding me with new growth and offshoots.

Happy plants … happy pots … it’s all wonderful!

Butterfly Tiles

Finally decided it’s time to post some of my pottery/ceramic work beginning with these butterfly tiles.  The images came from a couple of rubber stamps that I have.  And, yes, it’s possible to use rubber stamps on clay.

The hard part was letting them dry a bit and then painting the details with underglaze.  Then came the harrowing part of bisque firing them and hoping that they didn’t crack.  Fortunately, they didn’t.

They were finished in a rake firing using a clear crackle glaze.  Then, I added hangers on the back of them so they could be used on the wall.

They’ve both been sold and I hope their new owners are enjoying them.