Santa Fe – Clay and Glass

When my friend Allee Etheridge found out I was going to Santa Fe, she urged me to go to Santa Fe Clay. So, on Saturday morning, I headed over there. Even with a GPS, I got a little lost and then got caught up in the Farmer’s Market & Art Show traffic. It took a while, but I found a spot in a huge parking garage and then walked over to Santa Fe Clay.

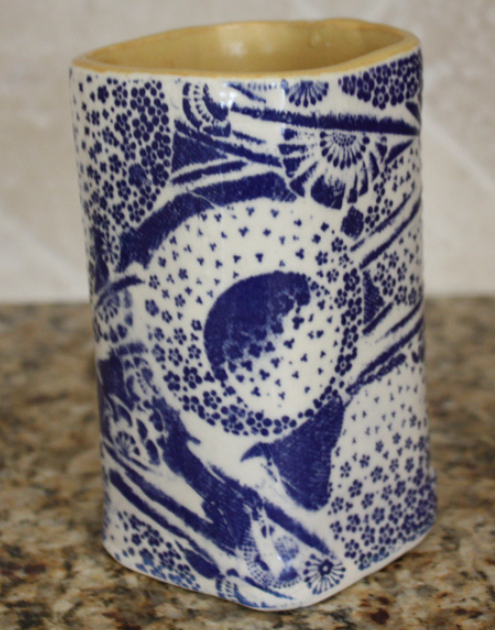
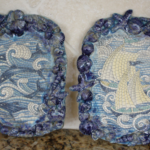
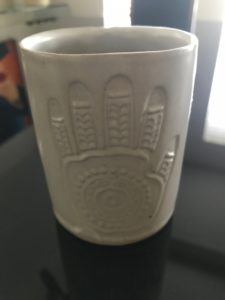
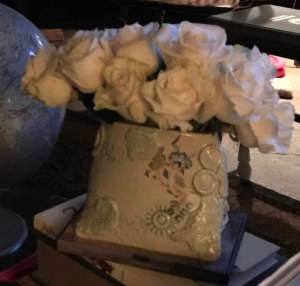
What looks like an unassuming (warehouse) building houses an amazing art gallery, retail space (for ceramic supplies), studio space, kilns, and more. It took a while to look at (and take pictures of) the pieces in the art gallery. Then, I *had to* buy some supplies and a mug.

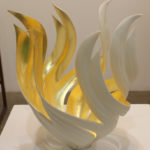
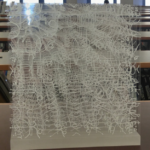
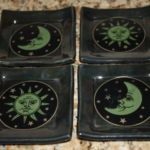
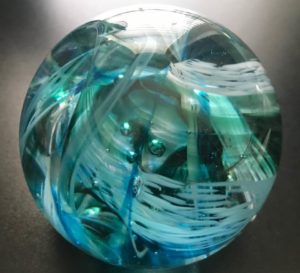
A quick visit to a local restaurant for lunch and I was off for my afternoon adventure: creating a glass paperweight at Liquid Light Glass. I’d been wanting to do something like this for a long time and this was the perfect opportunity. Fortunately, there were two experts helping us (me and 8 others) through the process. But, instead of taking my piece with me that day, I had to wait until Monday to pick it up. Apparently, after creating the paperweights, they have to be in a kiln to anneal and then cool.

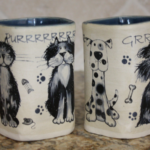
Anyway, here are photos of the mug from Santa Fe Clay and the paperweight from Liquid Light Glass.

Yard Art (or what do you do with all that pottery??)

Seriously … what do you do with all that pottery? You can’t keep everything and you can only “gift” a few pieces to relatives and friends before they start running the other way. Unless you have a gallery or a storefront or are willing to spend hours taking photographs and posting on Etsy (then wrapping, packing and shipping), it’s hard to find homes for all the good, perfect or nearly perfect pieces.

Then there are the pieces that didn’t turn out quite as expected. Perhaps they cracked while being fired or the glaze turned out really ugly or … whatever. Some of these can be put in a box and be donated to a charity. Some can end up in the trash can. But there are those pieces that you’re still fond of.

Well … if you have a house (I do) and a yard (oh, yes), there’s a solution: yard art!! I have pieces in the garden, under downspouts, hiding under leaves of plants (pictures, below).

My Left Foot

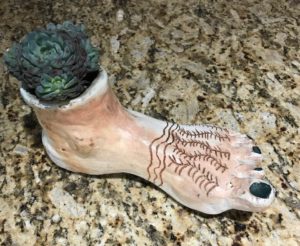
Remember about three months ago when I broke my leg?  Well, I sure do.    After healing for a couple months and, while I was still trying to get stronger and more flexible, my doctor sent me to rehab.  That was the best thing for my leg/ankle.

The therapist worked with me a couple times a week for four weeks.  At the end of that time, there were a few twingy reminders of the injury, but I was 98% back to normal.  So …. as a “thank you” gift, I took her a small sculpture of my left foot and put a small succulent inside.

Hopefully, the succulent will continue to grow and I will continue to heal.

Art 214

In Dallas, April is “Art Month” with galleries and art venues hosting a variety of events.

This year (2018), for the first time the City of Dallas Office of Cultural Affairs (OCA) sponsored  ART 214 Juried Exhibition.

“As part of Dallas Arts Month, four cultural centers of the City of Dallas Office of Cultural Affairs (OCA) are hosting a multi-venue juried exhibition to showcase the works of artists who live in Dallas and the greater North Texas region from late March to early June.

Through this exhibition, OCA hopes to discover and develop relationships with new artists, provide opportunities for artists to exhibit their work for the first time ever or for the first time in one of our cultural centers, and cross pollinate artists who have previously exhibited at one cultural center by exhibiting their work at a different center. Another goal of this collaborative project is to draw in new audiences who have never been to (or even heard of) our Cultural Centers and to share audiences who frequent a specific center but have never experienced the others.”

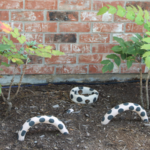
More than 750 entries were received and, when the jury process was complete, 192 pieces by 137 local North Texas Artists were selected to be in the exhibition.

I’m honored that my entry, “Uncommon Stones,” is included in the exhibition at the Latino Cultural Center.  Here’s the description that was submitted with the entry:

Finding an actual geode is a rare experience. They look like common stones but, when cracked open, they reveal their hidden beauty. So, I wondered, could I take clay and glass and create faux geodes? These Uncommon Stones are close but don’t rival the real thing. Clay and glass; reduction fired

Not My Circus … Not My Monkeys

Way back in early 2017, when the new administration in Washington D.C. was transitioning, chaos reigned.  My heart sank.  But, instead of railing against them on social media or crying constantly (as many of my friends did), I went to the studio and created a new totem with a circus theme.  All the while, “not my circus … not my monkeys” ran through me.

This piece took some digging to get appropriate photographs; then, incorporate them into a monkey graphic; and, finally, send them off to have decals created.  Originally, I wanted a three-ring circus, but the rings kept cracking/breaking during firing.

The finished piece is not symmetrical.  It wobbles somewhat.  And it stayed in my studio for well over a year until a friend was having a “meet the Democratic candidates” gathering at her home.  I offered her the totem as a sort of door prize for anyone who would have it.  She decided to turn it into a fund-raising opportunity and give attendees the opportunity to bid on it.  And, someone did and took home the totem.  Hope it lives a long and happy life in her home.


Two Perfect Matches

Sometimes I create a piece of pottery that seems destined to find a home with one of my special friends.  Recently, two pieces ended up in their perfect place.

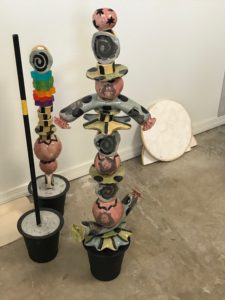
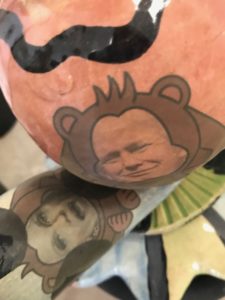
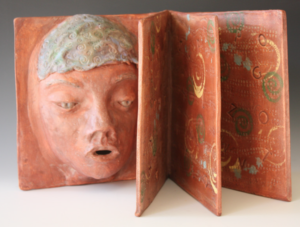
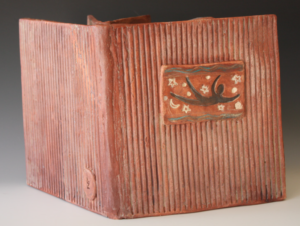
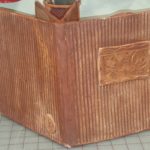
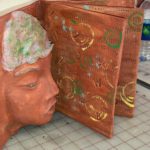
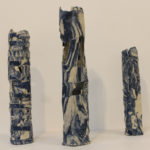
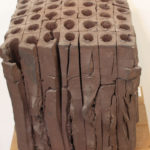
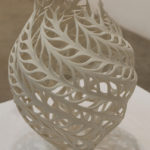
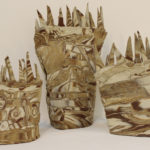
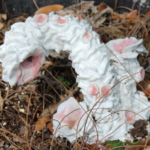
The first piece is a vase with many stamped details and additional textured pieces added on.  It was given a colored wash before being clear glazed.  Then, decals were added and the piece was fired again.

I’m thrilled that this ended up in the home of a dear friend.  It fits her eclectic style perfectly.

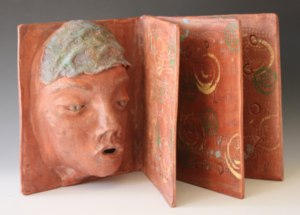
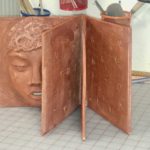
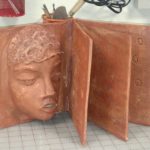
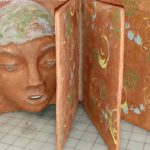
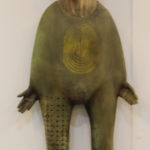
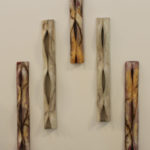
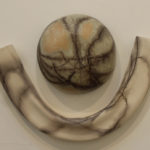
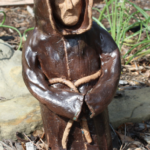
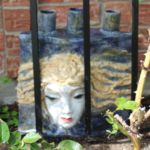
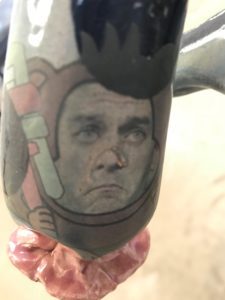
The other piece is a wall mask that just seemed to “belong” to my trainer.  It suits him and he’s already hung it in his home.

My closet is overflowing with pieces.  Hopefully all of them will find their way to their perfect homes.


And the winner is …

A small group gathered at the main Dallas Public Library for the FODPL reception on Wednesday, August 10th.   All 16 entries for their “Reading to my Friends” competition were on display.  There was such variety and creativity that the judges had a tough job choosing winners.

The piece below on the left was the grand prize winner and it’s beautifully conceived and executed.  The other three pieces were honorable mentions … including my piece on the far right.

All pieces will be on display at the main Dallas Library until the end of August.

“Once Upon a … Happily Ever After”

Remember a couple weeks ago when this piece was a “work in progress” and I couldn’t decide how to finish it? When in doubt, ask an expert.

So, I asked my friend and expert pottery teacher, Nancy Trezza.  She suggested that I just put a coat of paste wax on it.  Great!!!

Lowe’s carries the paste wax and I had plenty of soft rags to apply it.  It gave the piece a soft luster.

Then, this piece (“Once Upon a … Happily Ever After”) was delivered to the Friends of the Dallas Public Library for their exhibition.

Fun with Decals

Lately, I’ve been looking at different ways to add a “something extra” to some of my pieces … so, I’ve been playing with decals and learned that there is definitely a learning curve in working with them.  There are several types of decals:  those you apply before the bisque fire and those you apply after a piece is glazed and fired.

UnderglazeDecal

The piece to the left has a decal that was applied before the pot was bisque fired.  It’s an underglaze design that’s been printed on a thin piece of rice paper.  Directions say to wet the decal and apply it to the piece.  I found it easier to brush water on the piece and then lay the decal over it and smooth with a dry brush.  It’s easy to smear the decal; so, it’s best to handle it as little as possible and leave it alone to dry.  This piece was glazed with a zinc-free clear and fired to cone 5.

Decals applied after a piece is glazed present other challenges.  The decals have to be soaked until they come loose from their backing paper before applying to the glazed piece.  The decal is fragile and can wrinkle or tear.  And after the decal is applied, it has to be gently brushed to remove all air bubbles; then, left alone for 24 hours.  Finally, the piece with the decal is fired to cone 017.

I didn’t realize how much he glaze color can affect the decal.  The moon & stars decals (below left) were put onto pieces with a dark blue glaze.  Mistake!  The moon & stars look green because the decal was yellow; blue & yellow = green.

Mistake 2: the middle picture shows decals that get lost with all the fru-fru around the edge.

The cats & dogs turned out pretty well.  Hooray!!  One out of three isn’t bad.

What Else?

This piece was built specifically for an exhibition at the Dallas Public Library.  It’s an open exhibition which means: just show up with your piece (I think).  The theme is “Reading to My Friends.”

Okay … so, the piece is built and red iron oxide was added when it was bone dry.  Then fired to cone 05.  Question is:  What else?  Do I add some underglaze and/or glaze and fire again?  Or do I just add clear shoe polish and buff it?

Decided to add some underglaze and dark highlighter.  Now, it’s back in the kiln, going to cone 5.   Also in the kiln is a test piece with low-fire clear underglaze and some crystals.  Thinking about adding those and firing again once this firing is finished.