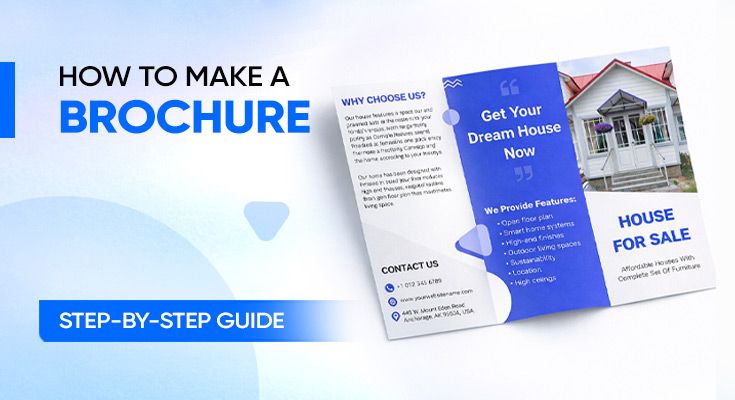
You need to promote your business, event, or service. You know a brochure is the right move. But if you have never designed one before, it can feel overwhelming. What size should it be? Which fold type works best? What exactly goes inside each panel?
Key Takeaways: A brochure is a folded marketing material used to share information about a product, service, or brand. Define your purpose, choose the right fold type, and plan your content before you start designing. Use high-quality visuals, concise text, and correct print specs to get a professional final result.
This guide walks you through exactly how to do it: 6 clear, beginner-friendly steps to build your brochure from scratch, practical design tips that separate brochures people actually read from ones that go straight in the bin, and answers to the most common questions beginners ask along the way.
How to Make a Brochure in 6 Simple Steps
Creating a brochure doesn’t have to be complicated. Follow these six steps, and you’ll have a polished, print-ready brochure in minutes.
Define Your Purpose and Target Audience
Before you open any design tool or pick a template, start with the most important question: What is this brochure supposed to do?
Your purpose will shape everything – the tone, the layout, the content, and even the type of fold you choose. Common purposes include:
- Promoting a product or service
- Introducing your business to new customers
- Sharing event details and schedules
- Educating an audience about a topic or cause
- Providing a company overview or portfolio
Next, think about your audience. Are they corporate executives or college students? Are they browsing a trade show booth or reading at a doctor’s office? Knowing who you’re speaking to will help you tailor your language, visuals, and call to action so the brochure actually connects with the right people.
Write down your goal and your target reader in one sentence before you start. For example: “This brochure promotes our photography studio to engaged couples planning their wedding.” Having this clarity upfront saves a lot of rework later.
Choose the Right Brochure Type and Size
One of the first design decisions you’ll make is choosing your format. This means picking both the fold type and the size.
Common Types of Brochure FoldsBi-Fold (Half-Fold)
1 sheet · 4 panels
Simplest format. Works well for a single, focused message with strong visuals.
Tri-Fold (Letter Fold)
1 sheet · 6 panels
Compact enough for a standard envelope. Versatile for product brochures, event programs, and more.
Z-Fold (Accordion Fold)
1 sheet · zigzag sections
Folds in alternating directions. Great for sequential storytelling or step-by-step processes.
door
reveal
door
Gate Fold
2 outer panels open inward
Creates a dramatic double-door reveal. Ideal for premium product launches and high-end brand presentations.
Learn more: Explore different types of brochures to choose the right format for your design
Standard Brochure SizesThe most common brochure size is 8.5″ x 11″ (US Letter), folded into thirds for a classic tri-fold design. If you need more room for visuals or content, larger formats like 8.5″ x 14″ or 11″ x 17″ are popular choices. In Europe, A4 (210 x 297 mm) is the standard equivalent.
For beginners, we recommend starting with a standard tri-fold brochure on 8.5″ x 11″ paper. It’s the most widely supported format, easiest to print, and fits neatly into most display stands and envelopes.
Learn more: Check the complete brochure size guide to select the perfect layout and dimensions
Plan Your Content and Layout
Now it’s time to figure out what goes inside your brochure and where. This step is all about knowing what to include in a brochure so that it’s both informative and easy to read.
What to Include in a Brochure- Keep your text short and scannable – readers spend very little time
- Use headings and subheadings to break up the content
- Stick to one or two key messages per panel
- Avoid jargon and write the way your audience speaks
- Always include your logo, website, and at least one contact method
Once you know what content you’re working with, sketch out a rough panel map, even just on paper, before jumping into a design tool. This saves a lot of time and prevents layout frustration later.
Choose the Right Brochure Maker
Most brochure tools look similar on the surface, but what’s under the hood is what matters. Here’s exactly what a good brochure maker gives you, and why each feature matters for a brochure you’ll actually be proud to share.
Design Your Brochure
With your tool selected and content ready, it’s time to design. Here’s how to approach this step as a beginner.
Review, Export, and Print (or Share Digitally)
You’re almost there. Before you print or share your brochure, take time to review it carefully.
Pre-Export Checklist:- Proofread all text for spelling and grammar mistakes
- Check that your logo, contact details, and CTA are clearly visible
- Make sure no important content is too close to fold lines or edges
- Review the brochure on multiple devices if it’s a digital brochure
- Show it to someone who has never seen it before and get fresh feedback
How to Print a Brochure
When exporting for print, always save your file as a high-resolution PDF (300 DPI or higher).
For small print runs, a standard home or office printer works fine. For larger quantities or premium quality, use a professional print service like Vistaprint, Moo, or a local print shop.
Going Digital
If you’re creating a digital brochure, export it as a PDF or interactive file and share it via email, your website, or social media.
Now that you understand how to create a brochure from start to finish, you might also want to explore how to make a flyer if you need a faster, single-page marketing option for promotions, events, or announcements.
Brochure Design Tips for Better Results
Now that you know how to design a brochure from start to finish, here are some additional tips to help you get better results.
1. Lead With Your Strongest Message. Your front cover headline is your hook. It needs to immediately tell the reader why they should open the brochure. Avoid generic headlines like “Welcome to Our Company” in favor of benefit-driven language like “Get More Done with Half the Effort.”
2. Keep It Focused — One Brochure, One Message. One of the most common mistakes is trying to say everything at once. Pick one clear goal and build your entire brochure around it.
3. Use Consistent Branding Throughout. Your professional design should feel like a natural extension of your brand. Use your brand’s colors, fonts, and logo consistently.
4. Align Your Elements with a Grid. Good brochure design isn’t random, it’s structured. Use your tool alignment guides or grid to ensure all elements are neatly aligned. Consistent margins and spacing make look intentional.
5. Make Your CTA Impossible to Miss. Your call to action should stand out visually. Use a button-style design element to draw attention to it. Keep it simple – tell the reader exactly what to do: “Call Now,” “Visit Our Website,” or “Scan to Book.”
6. Print a Test Copy First. Before printing in bulk, always print and fold one copy by hand. This lets you see exactly how the panels align, how the colors look in print versus on screen, and whether any text falls awkwardly near a fold.
7. Consider How to Create a Brochure for Free. You don’t need to spend money to make a brochure. Tools like DesignWiz offer free plans with access to brochure templates and basic design features. Start free and upgrade only when you need advanced features.
Frequently Asked Questions
Yes. DesignWiz brochure maker offers free plans that include editable templates, design tools, and PDF export. These are more than sufficient for most beginner brochure projects. You only need to pay for printing or premium design features.
Most brochures are single-sheet documents with either 4 panels (bi-fold) or 6 panels (tri-fold). Multi-page brochures, sometimes called booklet brochures, can have 8, 12, or more pages and are common for product catalogs or detailed company guides.
The tri-fold (letter fold) is the most beginner-friendly option. It is the most common format, supported by nearly every design tool and print service, and provides enough panels to tell a complete story without being too complex to design.
A print brochure is a physical, folded document distributed in person or by mail. A digital brochure is an electronic version, usually a PDF or interactive file, shared online via email, websites, or social media. Digital brochures are more cost-effective and easier to update, while print brochures tend to be more memorable and tangible.
Always export as a PDF at 300 DPI for printing. PDF files preserve your fonts, colors, and layout exactly as designed. If your print service requires it, include bleed margins (typically 0.125 on all sides) to avoid unwanted white borders after trimming.
Final Thoughts
Making a brochure is simpler than most people think. With a clear purpose, the right tool, and a little attention to design, anyone can create something that looks professional and gets results – no design degree required. You now have everything you need to get started. Stop overthinking it, open your brochure maker, and build your first one today.